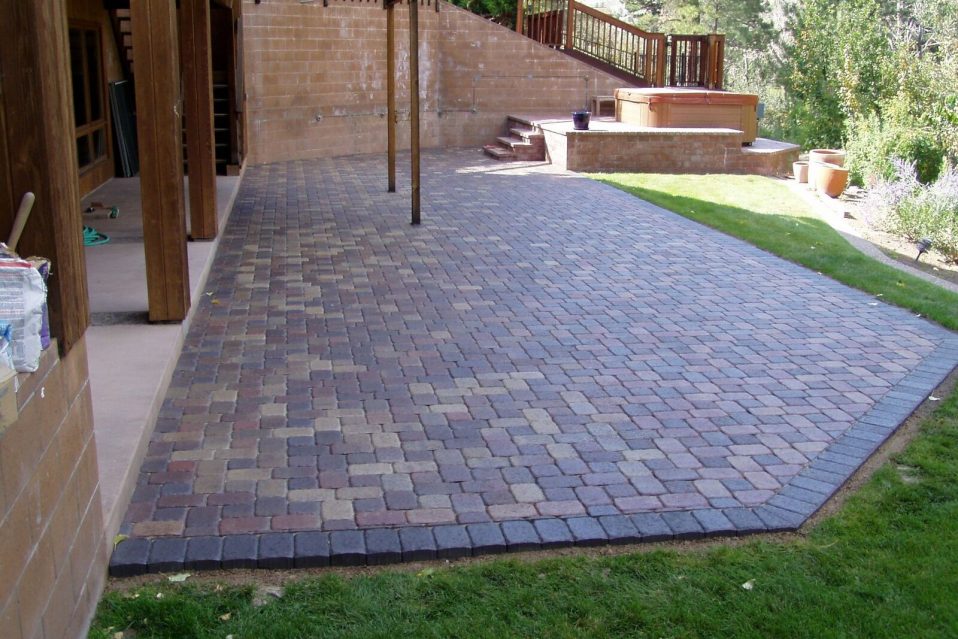
Many homeowners across the globe dream of owning a beautiful paver patio. And for good reason. Pavers have proven themselves to be the best alternative when it comes to hardscape flooring. So, in case you’re looking for that change, is it ok to pave over an existing driveway?
Let’s talk about all the possibilities, present you some scenarios and talk about all the possibilities regarding covering a driveway with pavers.
So let’s get right into it.
Jump to
Is it Ok to Pave Over an Existing Driveway? What Material are You Working With?
To answer the question immediately: yes. In 90% of the cases, there is a way to pave over an existing driveway. However, your situation might change drastically depending on what material your pre-existing driveway consists of.
There are basically three scenarios you’re dealing with: paving over a driveway without hardscape alterations, over another set of pavers, or over a driveway made out of another material.
If your driveway has no hardscape alterations, it is simply a matter of cleaning things up and performing a regular paver installation.
If your driveway consists of pavers already, we definitely not recommend you pave over them. Removing pavers is extremely simple, and the bedding can easily be replaced with a new installation.
However, over a driveway that does not consist of pavers, things can get a little more complicated.
In that case, the most common materials used to build a driveway are concrete and asphalt, with rubber sometimes appearing as well. For those situations, many more steps have to be taken to ensure a proper installation.
So let’s focus on those cases specifically and give you a guide on how to install pavers over an existing concrete or asphalt driveway.
The Right Choice of Pavers
First, your choice of pavers is limited in these situations. You can’t use any paver you desire in those cases, you’ll have to stick with thin pavers.
This paver is a variation of your regular paver that serve this purpose specifically. To account for the height that the concrete and asphalt already add, the idea is to use the pavers more like a finish than a structure itself.
Thin paver are really easy to work with. They are usually found in their concrete variation, although there are some other options available in the market.
Preparing the Driveway
Before going to the de facto guide, there’s a question we want to ask: removing the concrete or asphalt completely is absolutely out of the question?
We ask that because if removing the driveway is possible, although you’re going to have to go through the hassle of actually doing it, you can perform a regular paver installation, which is much simpler and yields better long term results.
If that’s not an option, then you can follow our guide and prepare your driveway for the pavers.
Step 01 – Cleaning Up the Driveway
Be mindful that when we say clean up, we don’t mean just sweep it up. It must be a thorough cleaning in regard to damaged parts of the installation. This is usually a very common turning point for many installations.
Usually, at this time, it is observed that the concrete or asphalt are not structurally sound enough. In that case, there’s really no way around it, and the only option is to remove the material completely.
So, to pave over a driveway, that driveway must be in a good enough quality and still provide a strong base for the pavers to be placed upon.
So sweep it of any debris and get rid of any broken pieces. Really scrap it all up until you’re left with a good and clean base.
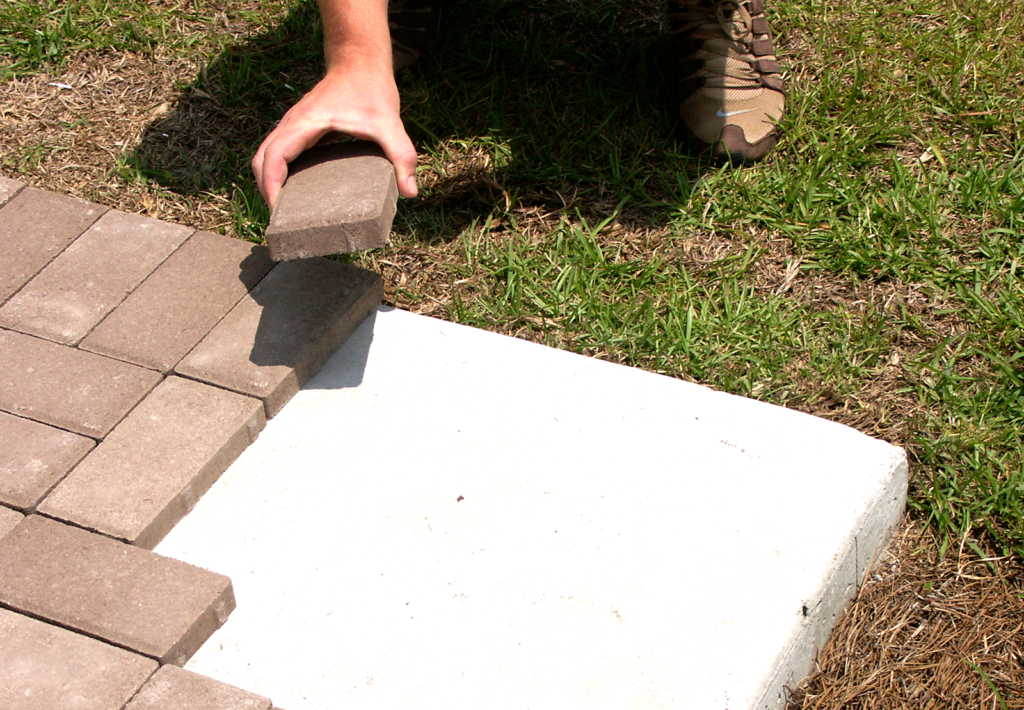
Step 03 – Edges of the Installation
After cleaning up, your first order of business is to place the outer line of paver at the edges of the installation. These are the only pavers that need to be glued to the concrete, using either mortar or construction adhesive.
They need to be locked in place in order to avoid your installation from shifting. If you’re working with interlocked pavers (which you absolutely should), they come with built-in spacers, so you don’t need to worry about that.
If they don’t come with these spacers, the recommended space between each paver is ⅛-inch, so take that into account.
Step 03 – Drilling Up the Driveway
This is arguably the hardest part of the job. At this point, you’ll have to drill a series of holes in strategic points around the driveway.
These holes should be about 1-inche in diameter, reach the ground and be around 2-feet apart from each other. Their objective is to ensure proper drainage around the installation.
Once the holes are done, you’re going to fill them up with pebbles to the brink and move on to the next step.
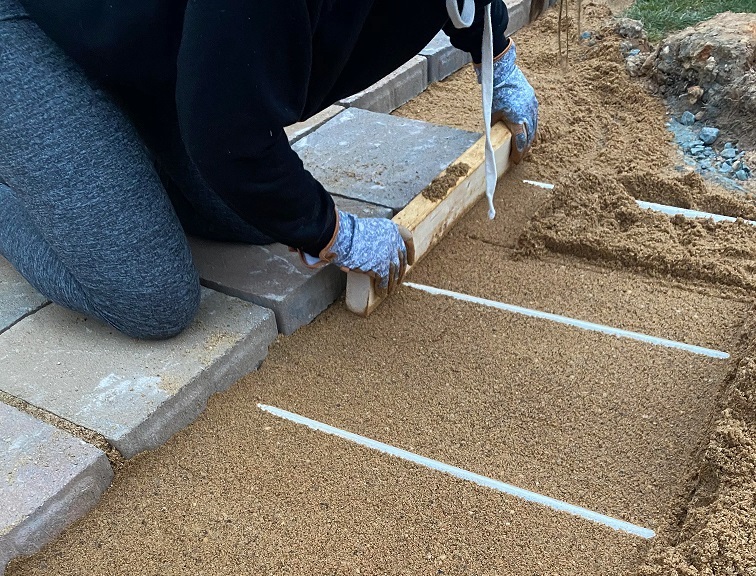
Step 04 – Spreading Sand
Now is time to spread sand all over the installation. The layer of sand covering the installation must have 1-inch. In order to do that, you can use the screeding technique. This technique consists of placing two 1-inch pipes alongside each other and covering them up with sand.
Then you’ll use a level board, like a 2×4, and use the pipes as “rails” in which to drive it. This will make sure you’ll end up with a perfectly leveled 1-inch layer of sand.
Step 05 – Placing the Pavers
Now is finally time to place the pavers, respecting the ⅛-inch minimal distance between pavers. We recommend the use of pacers in case you’re not working with interlocked pavers.
Simply place the pavers using the drop and click method, where you gently drop the pavers in the correct position, gently tapping them in place with a rubber mallet.
Start from the edges and slowly work your way towards the center. Patience is the key here.
Step 06 – Final Steps – Sanding and Sealing
With the pavers in place, now all you have to do is finish the job, starting with the sanding.
Spread polymeric sand alongside your entire installation and gently sweep them up until all the joints between the pavers are filled. Once they are filled, thoroughly remove the excess sand. Following that, you’re going to wet your paver, just enough to activate the polymeric sand.
At this point, some white stains might appear. That’s a normal reaction from the polymeric sand, and those stains should disappear after two week or so.
After that waiting period, it is time to go ahead and seal your installation. Sealing is an important step that should not be skipped, so make sure to pay the deserved attention to it.
Professional Assessment and Installation
And there you go. Now you know not only that it is ok to pave over an existing driveway, but the proper steps to do so.
But bear in mind, installing pavers over concrete or asphalt can be a challenging scenario better left for professionals.
Qualified hardscape contractors can point you in the right direction and help you create the best possible installation according to your needs. That’s why we always recommend you get in touch with a professional in your area.
And if you are around the Sarasota and Manatee counties, in FL, why not give us here at Eagle Pavers a call to help you? Over 14 years we have helped homeowners around our area with their projects and with development of the hardscape project they always dreamed of.
You can contact us right now at +1 941-210-4192 or email us at sales@eaglepavers.us. We would be happy to hear from you and help you with any paver need you might have.
Polymeric Sand Colors: 7 Tips to Choose
Polymeric sand is a building hardscape material used in the spaces between paving stones in…

A guide to indoor pavers in home design
Who says that paving stones can’t be implemented into interior decoration? Despite their outdoor nature,…
How to Install Permeable Pavers in 10 Steps
Among the many types of paving stones available for hardscape design, permeable pavers have been…